
If you haven’t scored a pair of official Eclipse Glasses yet, don’t worry: You can make your own pinhole viewer. NASA’s Jet Propulsion Lab provides instructions on their website.
According to the experts, with just a few simple supplies, you can make a pinhole camera that lets you watch a solar eclipse safely and easily from anywhere.
There are some warnings:
- Never look at the sun directly without equipment that’s specifically designed for looking at the sun.
- Even using binoculars or a telescope, you could severely damage your eyes or even go blind!
- Solar eclipses themselves are safe. But looking at anything as bright as the sun is NOT safe without proper protection.
- No, sunglasses do NOT count.

Cereal box pinhole viewer for your eclipse-viewing pleasure. Photo/Erich Martin
Alternatively, you can learn how to easily construct a pinhole viewer from an old cereal box. Here’s a tutorial from our friends at LevittownNow.com.
⇒Click here for a map of what to expect during the Aug. 21 solar eclipse in Manchester.
How to make a pinhole viewer, via NASA’s Jet Propulsion Lab:
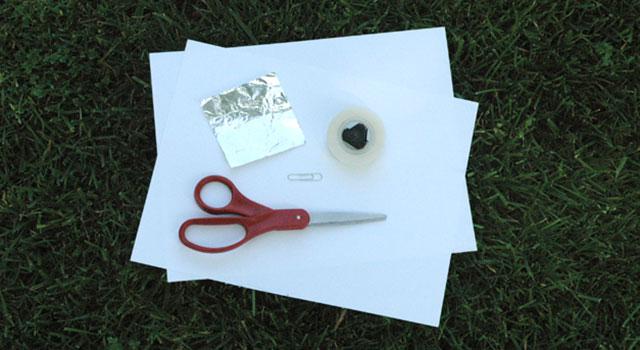
Materials
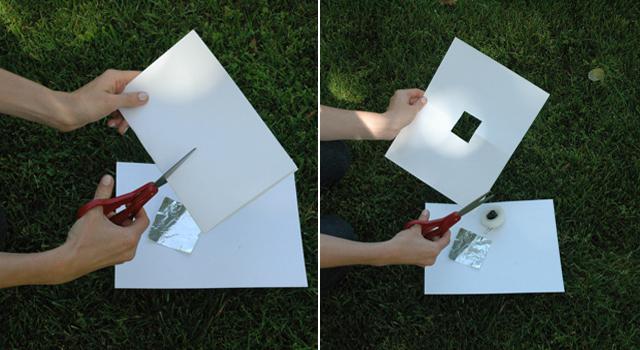
1. Cut a square hole
Cut a square hole into the middle of one of your pieces of card stock.
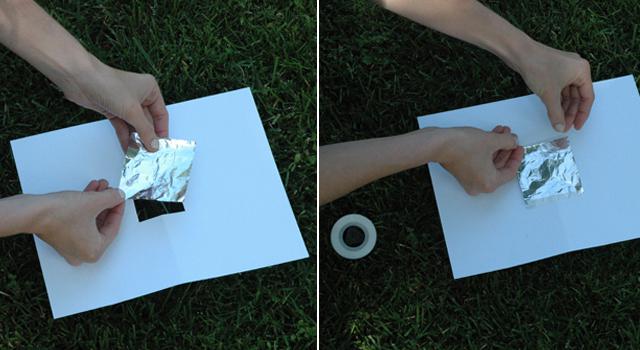
2. Tape foil over the hole
Tape a piece of aluminum foil over the hole.
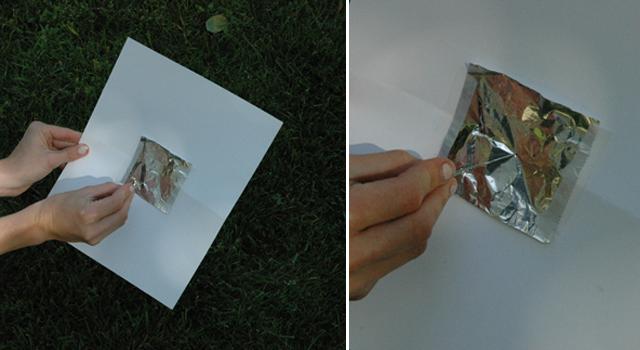
3. Poke a hole in the foil
Use your pin or paper clip to poke a small hole in the aluminum foil.
4. Try it out
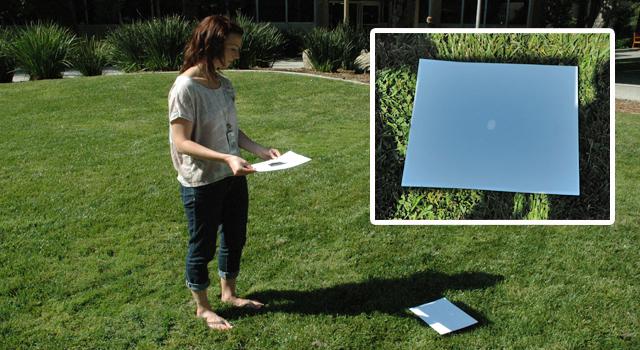
Place your second piece of card stock on the ground and hold the piece with aluminum foil above it (foil facing up). Stand with the sun behind you and view the projected image on the card stock below! The farther away you hold your camera, the bigger your projected image will be.
To make your projection a bit more defined, try putting the bottom piece of card stock in a shadowed area while you hold the other piece in the sunlight.
5. Get creative
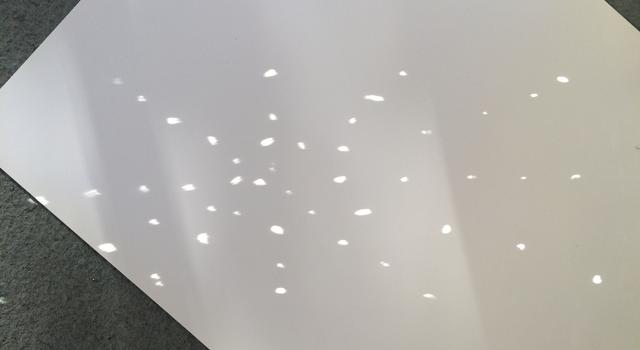
For extra fun, try poking multiple holes in your foil, making shapes, patterns and other designs. Each hole you create will turn into its own projection of the eclipse, making for some neat effects. Grab a helper to take photos of your designs for a stellar art project you can enjoy even after the eclipse has ended.
